
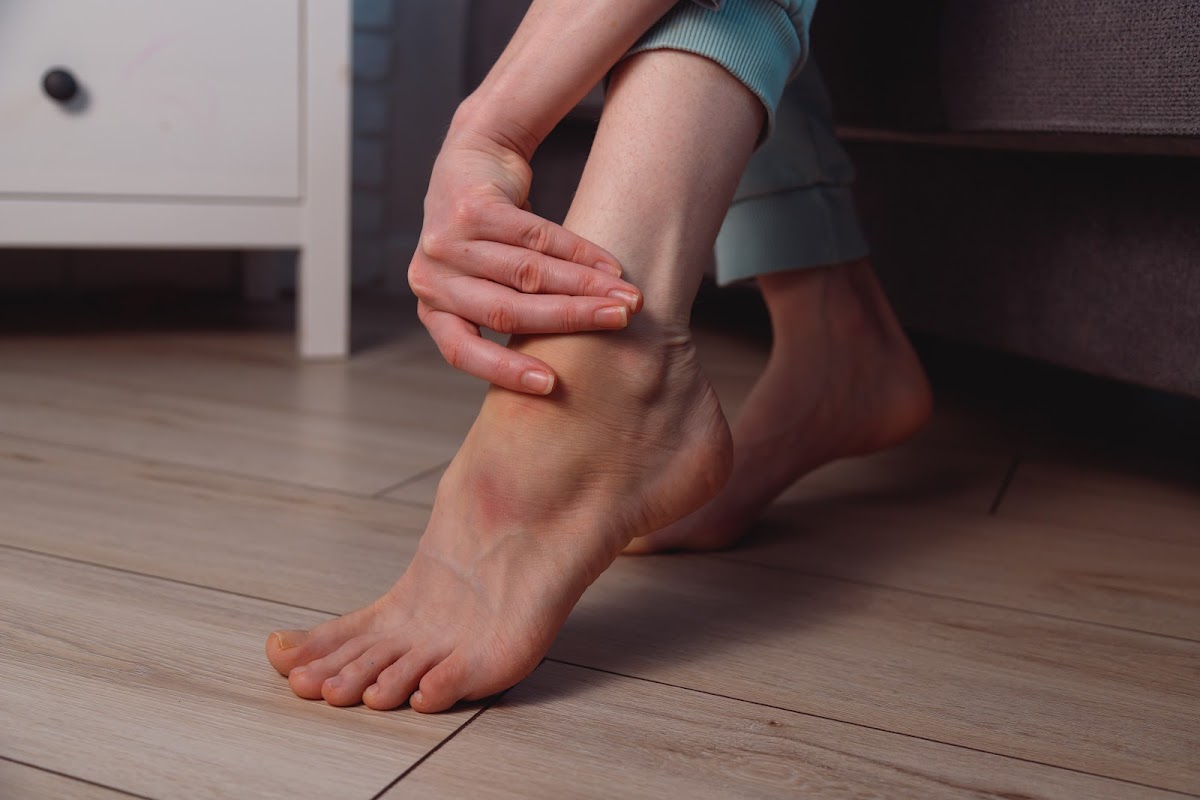
Rolling an ankle can feel like a cruel joke. One moment, you’re powering down the basketball court or cruising along your favorite jogging route; the next, you’re sprawled on the ground, clutching a rapidly swelling joint. Suddenly, climbing a flight of stairs feels like scaling a mountain. Your favorite sneakers pinch at every step, and each unexpected wobble sends a fresh stab of worry — “Did I make it worse?”
While most athletes and weekend warriors know to rest, ice, and apply a supportive brace during the first 48 hours, very few have a clear roadmap for what comes next. Without a solid plan, it’s easy to push too hard (or not hard enough) and end up stuck in limping limbo for weeks or even months.
This guide explains the entire follow-up process, highlights realistic timelines, and demonstrates how the team at Southernmost Foot and Ankle Specialists can help you transition from pain to peak performance without making false promises.
 Why Setting Expectations Matters For Your Recovery

Expectations can make or break your recovery mindset. Come in believing you will be back to full-speed drills in a week, and you will likely end up frustrated or cutting corners. Assume the ankle joint is doomed forever, and you may avoid the very movements that stimulate healing.
A balanced approach (steady, measurable gains each week) is the sweet spot that research and seasoned physical therapists recommend.
- Mild strains (Grade I) often regain near-normal function in 10–14 days, but complete ligament strength may take 4–6 weeks.
- Moderate sprains (Grade II) typically require 6–8 weeks of structured rehabilitation exercises, including proprioceptive and strengthening exercises.
- Severe tears (Grade III) can stretch beyond 12 weeks and occasionally need surgical consults if conservative care fails.
In every case, micro-goals (such as walking pain-free, regaining full ankle dorsiflexion, or balancing on the injured ankle for 30 seconds) matter more than the calendar alone.
Why timelines vary
- Age and overall health: Younger, active adults often heal faster.
- The severity of the sprain: More torn fibers mean more time for complete ligament remodeling.
- Adherence to therapy: Following your plan closely accelerates the healing process.
Don’t rush your body to rebuild ligament tissue at its own pace.
The Anatomy of an Ankle Sprain — Quick Refresher
Your ankle joint is a complex hinge that bears your entire body weight, and even a slight misstep can overload its delicate balance of bones, ligaments, and tendons:
1. Bones
- Tibia & Fibula: Form the “mortise,” or socket, at the top of the ankle
- Talus: Sits inside that socket and transmits forces from your leg to the foot
2. Ligaments – Lateral Complex (Outside)
- Anterior Talofibular Ligament (ATFL): Most commonly injured
- Calcaneofibular Ligament (CFL)
- Posterior Talofibular Ligament (PTFL)
- Medial (Deltoid) Ligament: Strong, fan-shaped band on the inside
3. Tendons & Muscles
Provide dynamic support and control fine movements, key players include the peroneal muscles along the outside of your ankle. The ankle relies on several layers of support. Bony stability comes from the tibia, fibula, and talus. Dynamic stability comes from muscles like the peroneals, tibialis anterior, and gastrocnemius.
Knowing which part of the complex is injured shapes the entire treatment of ankle sprains. Lateral injuries are by far the most common, but high ankle sprains and medial sprains demand different timelines and protective strategies.
How Sprains Occur
When a ligament tears, the body immediately responds with pain, swelling, and bruising, signals that protective scar tissue will form as healing begins. But scar tissue is weaker and less flexible than standard ligament fibers. That’s why guided rehabilitation and progressive loading (the gradual reintroduction of movement and weight-bearing) are essential to rebuild strength and prevent chronic instability.
- Inversion Mechanism (Rolling Outward): The Foot twists inward while the body continues moving forward. Stretches or tears the ATFL and CFL.
- Eversion Mechanism (Rolling Inward): Less common but more severe; tears the deltoid ligament.
- Forced Dorsiflexion or Plantarflexion: Extreme up-or-down bending of the foot can also overload supporting structures.
For an in-depth look at how we evaluate and image ankle injuries, check out our digital X-ray and diagnostic services.
Follow-Up Ankle Care For The First 72 Hours
The first three days after your ankle sprain lay the foundation for a smooth recovery. During this period, your goal is to protect injured tissues, control swelling, and maintain gentle movement to prevent stiffness.
You have heard it before, but it bears repeating: Protect, Rest, Ice, Compress, Elevate. Place a pillow under the calf, keeping the foot above heart level, and use a compression sleeve or a light Ace wrap to limit edema.
Unlike outdated advice that encouraged absolute immobilization, up-to-date research favors controlled movement even during the acute phase. Simple range of motion exercises (such as gentle ankle alphabet drills) pump fresh blood into the joint and prevent scar tissue from forming haphazardly.
Tip: Write the alphabet twice each hour with your big toe, but stop before pain exceeds a mild 3/10 on the pain scale. If swelling increases after a set, you may be pushing too hard.
Keep a simple log of pain levels (on a 0–10 scale) and swelling each morning and evening. Share this log at your first physical therapy appointment to tailor your plan.
Week 1–2: Regaining Range of Motion
By the start of Week 1, most of the acute swelling and pain have subsided enough that you can begin gentle movement, critical for preventing stiffness and kick-starting ligament healing. This stage focuses on preventing the joint from stiffening. Focus on three angles:
- Dorsiflexion: Slide the injured foot back while keeping the heel down until you feel a stretch in the calf.
- Plantarflexion: Point the toes away while seated, holding for five seconds before returning to neutral.
- Ankle inversion and eversion: Gently tilt the sole inward and outward, being especially mindful not to force through sharp pain.
A rolled towel under the ankle or a resistance band anchored to a chair leg lets you perform low-load ankle opposition movements safely. Perform 15–20 controlled reps 2–3 times daily. According to a 2019 systematic review, early therapeutic exercise reduces reinjury rates by nearly half compared with rest alone.
Weeks 2–4: Introducing Strengthening Exercises
Once swelling has stabilized and walking is comfortable, it is time to strengthen the kinetic chain. Classic ankle strengthening exercises include:
- TheraBand dorsiflexion, eversion, and inversion: Slow, deliberate pulls against elastic resistance.
- Calf raises: Start double-leg on the floor, progress to single-leg, then elevate onto a stair for full range.
- Toe curls: Place a towel flat and scrunch it toward you to engage intrinsic foot muscles.
- Isometric holds: Press the foot against a wall in all four directions for five-second squeezes.
Three sets of 10–15 reps, every other day, is a standard prescription. If your ankle feels unstable afterward, consider wearing a semi-rigid ankle brace for light protection while the tissues recover and adapt.
Weeks 4–6: Balance and Control Exercises
The difference between a healthy joint and an unstable ankle often boils down to proprioception, the body’s ability to sense joint position without visual cues. Re-training that system takes patience.
- Single-leg stands: Begin on firm ground. Aim for 30 seconds without touching the opposite foot down.
- Eyes-closed balance: Remove visual input to amplify ankle feedback.
- Foam-pad or wobble-board work: Bend the knee slightly to mirror sport positions.
- Lateral hops: Light, two-inch jumps side-to-side over a line to mimic unpredictable court or field cuts.
Not every home has a wobbleboard, but a folded pillow or a couch cushion can provide a similar challenge. Southernmost Foot and Ankle Specialists frequently incorporate these drills into their in-office physical therapy sessions, ensuring alignment is precise before gradually increasing difficulty.
Weeks 6–10: Return-to-Sport Conditioning
By now, pain should be minimal, and walking should be painless daily. That said, the incidence of recurrent ankle sprains skyrockets if athletes skip this phase.
- Agility ladder drills: Forward, backward, and diagonal steps ramp up speed while maintaining controlled joint angles.
- Plyometrics: Exercises, such as box jumps, jump rope, and single-leg bounds, teach the joints to absorb and redirect force.
- Cariocas and shuttle runs: Lateral and rotational components reinforce multi-plane stability.
- Sport-specific drills: Basketballers practice lay-ups, soccer players run cut-and-kick combos, and runners add short hill sprints.
Your physical therapist monitors symmetry between limbs, timing you on hop tests or evaluating mechanics with high-speed video. Only when metrics match 90–95 percent of the uninjured side do most clinicians clear an athlete for unrestricted play.
Chronic Ankle Instability — When Progress Plateaus
If you feel recurring ‘giving way’ or persistent swelling beyond 12 weeks, you might be facing chronic ankle instability. Contributing factors include:
- Incomplete ligament healing from repeated ankle sprains.
- Poor neuromuscular control, particularly during ankle eversion and inversion movements.
- Weaknesses up the kinetic chain, hip, core, and even opposite leg deficits.
Solutions extend past simple ankle exercises. Your clinician may add hip abductor strengthening, taping techniques, or even a custom orthotic to correct excessive pronation. In stubborn cases, advanced options such as platelet-rich plasma injections or surgical ligament reconstruction may be considered. Southernmost Foot and Ankle Specialists have treated thousands of such cases since 1982, making them a trusted resource for complex foot and ankle conditions.
The Role of Prophylactic Ankle Bracing and Taping
A well-fitted brace is not a crutch; it is an insurance policy. Studies show that prophylactic ankle bracing reduces the risk of initial sprains by up to 69 percent among athletes with a prior history. Key points:
- Opt for a semi-rigid or lace-up model that limits excessive inversion without locking the joint completely.
- Replace worn straps or Velcro promptly; support degrades faster than you think.
- Use braces during practices and games for at least six months post-injury.
- Pair bracing with continued ankle strengthening exercises; bracing alone cannot rebuild tissue integrity.
Footwear, Orthotics, and Everyday Habits
Even the best therapy program falters when you lace up worn-out shoes. Replace running or court shoes every 300–500 miles, sooner if you notice compressed midsoles. People with flat feet or excessive pronation may benefit from custom orthotics that support the medial arch, reducing twist forces on the injured ankle.
Urgent Foot Care’s on-site lab can scan and fabricate devices within days, shortening the wait. Ligaments heal slowly because they lack a rich blood supply. Collagen-rich foods (bone broth, gelatin, vitamin C-laden fruits) may assist matrix remodeling. Adequate protein (roughly 0.6–0.8 grams per pound of body weight) supports tissue repair.
Always consult your physician before taking supplements, especially if you are taking medications that may interact with anti-inflammatory drugs or herbal products.
 Red Flags — When to Seek Further Evaluation
While most sprains recover with conservative care, call your provider if you notice:
- Severe bruising spreading up the leg within 24 hours.
- Inability to bear any weight after 5 days.
- Numbness or tingling that lasts more than a few minutes.
- Repeated ankle sprains with minimal trauma.
These could signal a fracture, nerve entrapment, or a high ankle sprain that needs different management.
When to Reach Out for a Check-Up
Even with perfect compliance, some warning signs require prompt attention:
- Persistent swelling or redness after a week of dedicated therapy.
- Sharp pain during basic exercises (e.g., ankle circles, calf raises).
- Instability or “giving way” sensations when bearing weight.
- New bruising without a clear cause.
If any of these occur, don’t wait. Schedule a follow-up to discuss possible adjustments, such as bracing or advanced modalities (e.g., laser treatment for soft tissue healing).
If you are ready to start or refine your recovery journey, schedule a session with the team at Southernmost Foot and Ankle Specialists. Our blend of hands-on care, in-office physical therapy, and decades of sports medicine experience will help you set (and meet) realistic expectations for every step of your ankle rehab.
COMMITTED
TO EXCELLENT SERVICE
Our philosophy has been that the patient always comes first.
EMERGENCY OPERATOR
24 HOURS
Get emergency care from a specialist right from the start. Don’t go to an urgent care, ER or general doctor. Come straight the specialist.